Discover the materials needed and follow our to learn how to draw a table. Improve your skills with for realistic drawing and avoid .
Materials Needed for Drawing a Table
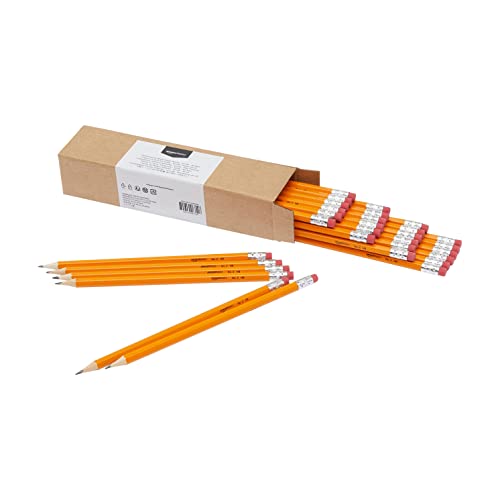
Paper and Pencil
To start drawing a table, you’ll need some basic materials. First and foremost, you’ll need a piece of paper and a pencil. These are essential tools for sketching out the different components of the table and adding details later on. Make sure to choose a quality pencil that allows for smooth and precise lines.
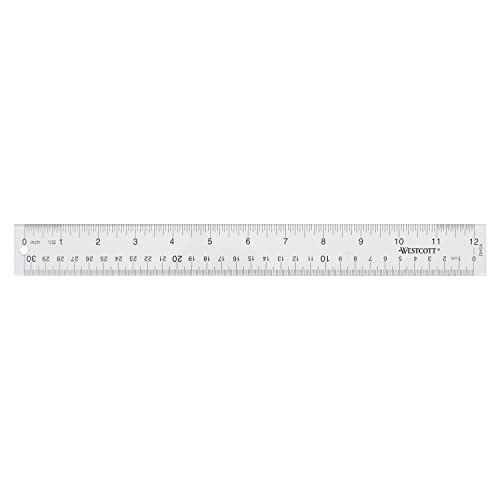
Ruler or Straight Edge
Next, you’ll need a ruler or a straight edge. This tool will help you draw straight lines, which are crucial for creating the clean and precise edges of the table. A ruler can also be handy for measuring the correct proportions and dimensions of the table.
Compass or Protractor
Lastly, it can be helpful to have a compass or a protractor when drawing a table. These tools allow you to create accurate curves or angles, which may be necessary for certain table designs. A compass can help you draw circular or rounded elements, while a protractor can assist in achieving precise angles.
By having these materials on hand, you’ll be well-equipped to begin your table drawing journey. Remember to choose good quality materials that suit your preferences and ensure comfortable and accurate drawing.

Basic Steps to Draw a Table
Start with Drawing a Rectangle
When it comes to drawing a table, the first step is to begin with a rectangle. This will serve as the basic shape of the tabletop. You can use a ruler or a straight edge to ensure that the lines are straight and even. Remember to keep the proportions in mind as you draw the rectangle, as this will determine the overall size of the table.
Add Legs to the Table
Once you have drawn the rectangle for the tabletop, it’s time to add the legs to your table. The number of legs will depend on the design you have in mind. For a traditional table, four legs are commonly used. Position the legs at each corner of the rectangle, making sure they are evenly spaced. You can use your ruler or straight edge to help you draw straight lines for the legs.
Draw the Tabletop
Now that you have the rectangle and the legs in place, it’s time to draw the tabletop. Start by connecting the top edges of the legs with straight lines. This will create the outline of the tabletop. Next, you can add details such as rounded corners or beveled edges to give the table a more realistic look. Remember to keep the lines smooth and clean for a polished finish.
Drawing a table may seem daunting at first, but by following these basic steps, you can create a solid foundation for your drawing. Take your time and pay attention to the proportions and details to achieve the desired result. Remember, practice makes perfect, so don’t be afraid to experiment and refine your technique.
Now, let’s move on to the next section where we will explore how to add details to your table.
Adding Details to the Table
Adding Table Edges or Borders
When it comes to adding details to your drawn table, one important aspect to consider is the table edges or borders. These elements can greatly enhance the overall appearance of your drawing and make it more realistic. Here are some on how to effectively add table edges or borders:
- Choose the right thickness: The thickness of the table edges or borders can vary depending on the style you want to achieve. Thicker edges can give a more substantial and sturdy look to the table, while thinner edges can create a more delicate and refined appearance.
- Use straight lines: To draw the edges or borders, you’ll want to use straight lines that follow the shape of the table. A ruler or straight edge can be helpful in achieving clean and precise lines. Pay attention to the angles and proportions to ensure that the edges are symmetrical and balanced.
- Consider the perspective: Keep in mind the perspective of your drawing when adding table edges or borders. If you’re drawing a table from a specific angle, the edges should follow the same perspective. This will help create a sense of depth and realism in your artwork.
Including Tabletop Patterns or Designs
Adding patterns or designs to the tabletop can take your drawing to the next level and make it more visually interesting. Here are some ideas for including tabletop patterns or designs:
- Experiment with different textures: Consider the material of the table and try to replicate its texture in your drawing. For example, if the table is made of wood, you can use cross-hatching or shading techniques to mimic the grain of the wood.
- Incorporate geometric patterns: Geometric patterns can add a modern and stylish touch to your table drawing. You can create patterns using shapes such as squares, triangles, or circles. Use a compass or protractor to ensure precision and consistency in your design.
- Explore floral or ornamental motifs: If you want to add a more intricate and decorative element to your table, consider incorporating floral or ornamental motifs. These can be inspired by real-life patterns or your own imagination. Take your time to sketch out the details and add shading to create depth.
Adding Shadows or Shading
Shadows and shading are crucial in creating a realistic and three-dimensional effect in your table drawing. They help define the form and volume of the table, making it appear solid and grounded. Here are some tips for adding shadows or shading to your drawing:
- Determine the light source: Before adding shadows, you need to identify the direction of the light source in your drawing. This will determine where the shadows will fall. Consider whether the light is coming from above, below, or from a specific angle.
- Use different shades of gray: When shading the table, use a range of gray tones to create depth and dimension. Start with a lighter shade for the areas that receive more direct light and gradually darken the tones as you move towards the shadows. This will help create a smooth transition between light and shadow.
- Pay attention to cast shadows: Cast shadows are the shadows that objects cast on other surfaces. When drawing the table, consider the cast shadows it creates on the floor or nearby objects. These shadows should be darker and have a distinct shape, depending on the angle and intensity of the light source.
Remember, adding details to your table drawing is all about paying attention to the small elements that bring it to life. By adding table edges or borders, including tabletop patterns or designs, and incorporating shadows or shading, you can take your drawing from a simple outline to a more realistic and visually captivating artwork.
Tips for Drawing Realistic Tables
Drawing a realistic table requires attention to detail and an understanding of key elements such as perspective, lighting, shadows, and design inspiration. By following these , you can create a table that looks lifelike and visually appealing.

Pay Attention to Perspective
When drawing a table, it’s crucial to consider perspective. Perspective refers to the way objects appear in relation to each other and their surroundings. To create a realistic table, you need to accurately depict the size and positioning of its various components.
- Start by establishing a vanishing point, which is a point on the horizon where parallel lines converge. This will help you maintain consistent proportions and angles.
- Use guidelines to ensure that the table legs and tabletop are correctly aligned. These guidelines can be drawn as dotted lines to guide your drawing process.
- Remember that objects that are farther away will appear smaller, so adjust the size of your table accordingly if it’s placed in the distance.
Observe Lighting and Shadows
Lighting and shadows play a crucial role in making a drawing look realistic. When drawing a table, consider the direction of the light source and how it interacts with the various surfaces.
- Determine the position of the light source in your drawing. This will affect where shadows are cast and how light reflects off the table.
- Use shading techniques to create depth and dimension. Darken areas where shadows would naturally fall, such as underneath the tabletop and legs.
- Pay attention to highlights and reflections. The tabletop may have a glossy surface that reflects light, while the legs may have subtle highlights where light hits them directly.
Study Different Table Designs for Inspiration
To enhance your drawing skills and bring more creativity to your table designs, it’s beneficial to study different table designs for inspiration. This can help you expand your knowledge of various styles, shapes, and details.
- Explore furniture catalogs, websites, or even visit furniture stores to observe different table designs. Look for tables with unique features, such as intricate patterns, interesting leg designs, or innovative materials.
- Take note of the proportions and shapes of different tables. Pay attention to how they interact with their surroundings and how their design elements contribute to their overall aesthetic.
- Experiment with combining elements from different table designs to create your own unique table drawings. Don’t be afraid to think outside the box and incorporate your own creative ideas.
By paying attention to perspective, observing lighting and shadows, and studying different table designs for inspiration, you can elevate your drawing skills and create realistic and visually captivating tables. Remember to practice regularly and have fun exploring different techniques and styles.
Common Mistakes to Avoid
Uneven Table Legs or Proportions
One common mistake when drawing a table is creating uneven table legs or proportions. It’s important to ensure that all four table legs are of equal length and thickness to maintain balance and stability. Additionally, the proportions of the table should be accurate and consistent. Uneven legs or proportions can make the table appear lopsided or unstable, detracting from its overall appeal and realism.
Inaccurate Perspective or Angles
Another mistake to avoid when drawing a table is inaccuracies in perspective or angles. Perspective is crucial in creating a realistic representation of a table. It involves accurately depicting how the table appears in relation to the viewer’s position. Incorrect perspective can result in a distorted or unnatural-looking table. Similarly, angles play a significant role in conveying depth and dimension. It’s important to pay attention to the angles of the table legs and edges to maintain a consistent and visually pleasing composition.
Overcomplicating Table Details
While adding details to a table can enhance its realism, it’s important to avoid overcomplicating the details. Adding too many intricate patterns or designs to the tabletop can make the drawing visually overwhelming and cluttered. Instead, focus on incorporating subtle and tasteful details that enhance the overall aesthetic of the table. Additionally, excessive shading or shadows can also detract from the simplicity and elegance of a table. It’s important to strike a balance between adding details and maintaining a clean and visually appealing drawing.
In summary, when drawing a table, it is crucial to avoid such as uneven table legs or proportions, inaccurate perspective or angles, and overcomplicating table details. By paying attention to these aspects, you can create a more realistic and visually pleasing representation of a table.