Discover the basics of Blender Arduino Serial Communication, including , sending and receiving data. Troubleshoot issues and optimize performance with and .
What is Blender Arduino Serial Communication?
Serial communication refers to the process of transmitting data between two devices using a serial interface. In the context of Blender and Arduino integration, serial communication allows these two powerful platforms to exchange information and work together seamlessly.
Understanding the Basics
To understand how Blender Arduino serial communication works, it’s important to have a basic understanding of both Blender and Arduino.
Blender is a popular open-source 3D modeling and animation software. It offers a wide range of features and capabilities for creating interactive and immersive virtual environments.
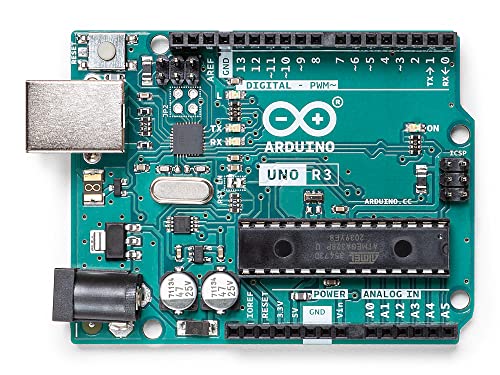
On the other hand, Arduino is an open-source electronics platform that allows users to create interactive projects. It consists of both hardware and software components, making it an ideal platform for controlling and interacting with physical devices.

Importance of Serial Communication in Blender and Arduino Integration
Serial communication plays a crucial role in integrating Blender and Arduino. It enables the exchange of data between the two platforms, allowing users to control physical devices from within Blender and vice versa.
By establishing a serial connection between Blender and Arduino, users can send commands, parameters, and sensor data back and forth. This opens up a wide range of possibilities for interactive projects, such as controlling robotic arms, animating objects based on sensor input, or visualizing real-time data in Blender.
Without serial communication, the integration between Blender and Arduino would be limited, and users would not be able to take full advantage of the capabilities offered by both platforms.
In the following sections, we will explore the process of setting up serial communication between Blender and Arduino, sending and receiving data, common issues, and exploring advanced techniques and . Stay tuned!
Setting Up Serial Communication between Blender and Arduino
Serial communication between Blender and Arduino allows for the exchange of data between the two platforms, enabling a wide range of possibilities for creative projects and interactive applications. To establish this communication, you need to follow a few essential steps.
Installing the Required Libraries
Before setting up the serial communication, you’ll need to install the necessary libraries for both Blender and Arduino.
For Blender, you can use the “pyserial” library, which provides a simple interface to communicate with serial ports. To install it, you can use the Python package manager “pip” by running the following command in your terminal or command prompt:
pip install pyserialOn the Arduino side, you don’t need to install any libraries specifically for serial communication. However, you should have the Arduino IDE (Integrated Development Environment) installed on your computer, as it provides the necessary tools for programming and configuring your Arduino board.
Configuring Arduino for Serial Communication
Once you have the Arduino IDE installed, you need to configure your Arduino board for serial communication. Connect your Arduino board to your computer using a USB cable, and then open the Arduino IDE.
In the Arduino IDE, select the appropriate board and port from the “Tools” menu. Choose the board model that matches the one you are using, such as Arduino Uno, Arduino Mega, or Arduino Nano. Then, select the correct port that your Arduino is connected to.

Configuring Blender for Serial Communication
To configure Blender for serial communication, you need to create a Python script that will handle the communication between Blender and Arduino.
In Blender, open the Text Editor and create a new script. Import the “serial” module from the “pyserial” library to establish the serial connection with Arduino. You can use the following code snippet as a starting point:
PYTHON
import serial
<h1>Define the port and baud rate for the serial connection</h1>
port = 'COM3'  # Replace with the appropriate port for your Arduino
baud_rate = 9600  # Match the baud rate with the one set in Arduino
<h1>Open the serial connection</h1>
serial_connection = serial.Serial(port, baud_rate)
<h1>Your code for serial communication goes here</h1>
<h1>Close the serial connection</h1>
serial_connection.close()
Replace the port variable with the correct serial port to which your Arduino is connected. Also, make sure the baud_rate matches the one set in your Arduino code.
With the serial connection established, you can now start exchanging data between Blender and Arduino. Keep in mind that you’ll need to write specific code for sending and receiving data based on your project requirements.

Remember to save the Python script in Blender and run it to initiate the serial communication between Blender and Arduino.
By following these steps, you can set up the serial communication between Blender and Arduino, opening up a world of possibilities for creating interactive and dynamic projects.
Sending Data from Blender to Arduino
Establishing a Serial Connection
Establishing a serial connection between Blender and Arduino is essential for sending data from Blender to Arduino. This connection allows the two devices to communicate and exchange information seamlessly. To establish a serial connection, follow these steps:
- Check the Hardware: Ensure that your Arduino board is properly connected to your computer via a USB cable. Make sure the board is powered on and detected by your computer.
- Install the Required Libraries: Before setting up the serial connection, you need to install the necessary libraries in both Blender and Arduino. These libraries provide the functions and tools required for serial communication. Refer to the documentation of the libraries for detailed installation instructions.
- Configure Arduino for Serial Communication: In order for Arduino to receive data from Blender, you need to configure the Arduino board to listen for incoming serial data. This can be done by uploading a sketch to the Arduino board that sets up the serial communication parameters, such as baud rate and data format.
- Configure Blender for Serial Communication: Similarly, you need to configure Blender to establish a serial connection with Arduino. This involves installing the required add-ons or scripts that enable serial communication within Blender. These add-ons provide an interface to send data from Blender to Arduino.
Sending Single Values
Once the serial connection is established, you can start sending data from Blender to Arduino. One common scenario is sending single values, such as sensor readings or control signals. Here’s how you can do it:
- Prepare the Data: Determine the value you want to send from Blender to Arduino. It could be a numeric value, a boolean (true/false) value, or even a string. Make sure the data is in a format that can be easily understood by both Blender and Arduino.
- Convert the Data: If necessary, convert the data into a format compatible with the serial communication protocol. For example, if you want to send a float value, you may need to convert it into a byte array or a string representation before sending it.
- Send the Data: Use the appropriate functions or methods provided by the serial communication libraries to send the data from Blender to Arduino. These functions typically take the data as input and handle the low-level communication details, such as framing and packetization.
- Receive and Process the Data: On the Arduino side, implement the necessary code to receive and process the data sent from Blender. This involves reading the incoming serial data and extracting the relevant information. Once the data is received, you can perform any required actions or computations based on the received value.
Sending Multiple Values
In some cases, you may need to send multiple values from Blender to Arduino simultaneously. For example, you may want to send a set of sensor readings or a collection of control signals. Here’s how you can achieve this:

- Prepare the Data: Determine the set of values you want to send as a group. Consider the data types and formats that best represent the information you want to transmit. It’s important to ensure that the data is organized in a way that can be easily parsed and processed by Arduino.
- Serialize the Data: Serialize the multiple values into a single data structure that can be transmitted as a whole. This could be a JSON object, a CSV string, or any other format that suits your needs. Serialization allows you to package the data in a compact and structured manner.
- Send the Data: Use the appropriate functions or methods provided by the serial communication libraries to send the serialized data from Blender to Arduino. This involves sending the entire data structure as a single message over the serial connection.
- Receive and Parse the Data: On the Arduino side, implement the necessary code to receive and parse the data sent from Blender. This involves extracting the individual values from the received message and storing them in separate variables or data structures. Once the data is parsed, you can use it for further processing or decision-making within your Arduino sketch.
By establishing a serial connection, you can easily send single values or multiple values from Blender to Arduino. This opens up a wide range of possibilities for controlling Arduino devices or integrating real-time data into your Blender projects.
Receiving Data from Arduino in Blender
Reading Serial Data in Blender
When integrating Arduino with Blender, one of the key aspects is the ability to receive data from the Arduino board and use it within the Blender environment. To achieve this, Blender provides a convenient way to read serial data.
To begin reading serial data in Blender, you need to establish a serial connection between the Arduino board and Blender. This connection allows the two devices to communicate and exchange data seamlessly. Once the connection is established, you can start receiving data from the Arduino board.
The process of reading serial data in Blender involves using the bpy module, which provides access to Blender’s Python API. With this module, you can create a script that listens to the serial port and reads the incoming data.
To read serial data, you will need to:
1. Import the bpy module in your Blender Python script.
2. Open the serial port using the appropriate parameters, such as the port name and baud rate.
3. Continuously check for incoming data using a loop.
4. Read the incoming data and store it in a variable for further processing.
Here’s an example of how you can read serial data in Blender:
PYTHON
import bpy
import serial
<h1>Specify the serial port and baud rate</h1>
port = '/dev/ttyACM0'
baud_rate = 9600
<h1>Open the serial port</h1>
ser = serial.Serial(port, baud_rate)
<h1>Continuously read serial data</h1>
while True:
if ser.in_waiting > 0:
# Read the incoming data
data = ser.readline().decode().rstrip()
<pre><code> # Process the received data
# TODO: Add your processing code here
# Print the received data
print(data)
</code></pre>This example demonstrates a basic for reading serial data in Blender. The ser.readline() function reads a line of data from the serial port, and the rstrip() function removes any trailing newline characters. You can then process the received data according to your specific requirements.
Parsing and Processing Received Data
Once you have successfully read the serial data in Blender, the next step is to parse and process the received data. This involves extracting meaningful information from the raw data and using it for various purposes within the Blender environment.
Parsing the received data involves breaking it down into its individual components or fields. For example, if the Arduino board is sending sensor data, you may need to extract values such as temperature, humidity, or acceleration from the received data.
To parse the received data, you can use various techniques depending on the structure and format of the data. Some common approaches include:
– Splitting the data string using delimiters such as commas or spaces.
– Using regular expressions to extract specific patterns from the data.
– Converting the data to a specific data type, such as integers or floats, for further manipulation.
Once you have parsed the data, you can process it according to your requirements. This may involve performing calculations, applying transformations, or triggering specific actions in the Blender environment based on the received data.
For example, if the Arduino board is sending sensor data representing the position of an object, you can use the received data to animate the corresponding object in Blender. By mapping the received data to the appropriate parameters, such as location or rotation, you can create dynamic and interactive animations.
In summary, reading serial data in Blender allows you to receive information from the Arduino board and incorporate it into your Blender projects. By parsing and processing the received data, you can utilize it for various purposes, such as animating objects, controlling simulations, or visualizing real-time data.
Troubleshooting Serial Communication Issues
Serial communication between Blender and Arduino may encounter issues that can prevent proper data transfer. This section will guide you through the process to help you identify and resolve these issues effectively.
Check Arduino and Blender Serial Settings
Before diving into more complex steps, it’s essential to ensure that the serial settings on both Arduino and Blender are correctly configured. Here are a few things to check:
- Baud Rate: Make sure that the baud rate settings match on both Arduino and Blender. The baud rate determines the speed at which data is transmitted and received. Mismatched baud rates can lead to communication errors.
- Serial Port: Verify that the correct serial port is selected on both Arduino and Blender. The serial port is the physical connection through which data is transmitted. Choosing the wrong port can result in a failed connection.
Verifying Hardware Connections
Another potential source of communication issues is faulty or improperly connected hardware. It’s crucial to verify the following:
- Cables and Connections: Ensure that the cables connecting Arduino and your computer are securely plugged in. Check for any loose connections or damaged cables that may hinder proper data transfer.
- Power Supply: Make sure that Arduino is receiving adequate power. Insufficient power supply can lead to unstable communication. Consider using a separate power supply for Arduino if necessary.
- Compatibility: Check if the Arduino board and Blender are compatible with each other. Different Arduino models may require specific configurations or additional hardware components for successful integration with Blender.
Debugging Common Errors
If you have checked the settings and hardware connections but are still experiencing issues, it’s time to delve deeper into common errors that can occur during serial communication. Some common errors and their potential solutions include:
- Timeout Errors: If you encounter timeout errors, it could indicate a problem with the baud rate or a delay in data transmission. Make sure the baud rate matches on both sides and consider adjusting any delays in your code.
- Data Corruption: Data corruption can occur due to electrical noise or inadequate grounding. Shielding your cables or using differential signaling can help minimize data corruption.
- Buffer Overflow: If you are sending or receiving large amounts of data, you may encounter buffer overflow issues. This can be resolved by optimizing your code to handle data efficiently and avoiding excessive data transmission.
- Incorrect Data Parsing: Incorrectly parsing received data can lead to misinterpretations and errors. Double-check your code to ensure that you are correctly parsing and processing the data received from Arduino.
By following these steps and addressing any issues that arise, you can overcome serial communication problems and establish a stable connection between Blender and Arduino. Remember to test your thoroughly after each step to ensure that the issue has been resolved.
Advanced Techniques for Blender Arduino Serial Communication
In this section, we will explore some advanced techniques for implementing two-way communication and sending/receiving complex data structures between Blender and Arduino.
Implementing Two-Way Communication
One of the key advancements in Blender Arduino serial communication is the ability to establish two-way communication between the two platforms. This means that data can be sent from both Blender to Arduino and vice versa, allowing for more interactive and dynamic projects.
To implement two-way communication, you will need to configure both Blender and Arduino accordingly. In Blender, you can use the pyserial library to establish a serial connection and send data to Arduino. On the Arduino side, you will need to configure the serial port and use the Serial library to receive and process data from Blender.
Once the two-way communication is established, you can create interactive projects where Blender and Arduino can exchange information in real-time. For example, you can create a virtual environment in Blender that reacts to sensor data received from Arduino, or control Arduino components based on user interactions within Blender.
Sending and Receiving Complex Data Structures
While sending and receiving single values is straightforward, there may be cases where you need to send more complex data structures between Blender and Arduino. This can include arrays, strings, or even custom data types.
To send complex data structures from Blender to Arduino, you can convert the data into a suitable format, such as JSON or CSV, and then send it over the serial connection. Arduino can then parse and process the received data accordingly.
On the Arduino side, you will need to implement a parsing mechanism to extract the relevant information from the received data structure. This can involve splitting strings, using regular expressions, or utilizing specific data extraction techniques depending on the format of the data.
By sending and receiving complex data structures, you can create more sophisticated projects that involve multiple variables and parameters. For example, you can send a set of coordinates from Blender to Arduino to control a robot arm, or send a sequence of keyframes to Blender to animate a virtual object.
Examples and Projects Using Blender Arduino Serial Communication
Controlling Arduino with Blender
Controlling an Arduino board with Blender opens up a world of possibilities for interactive projects. By establishing a serial communication between Blender and Arduino, you can send commands from Blender to control various aspects of your Arduino board. Whether you want to turn on an LED, control a motor, or even build a robotic arm, the integration of Blender and Arduino allows you to bring your creations to life.
To control Arduino with Blender, follow these steps:
- Establishing a Serial Connection: First, you need to establish a serial connection between Blender and Arduino. This involves configuring the serial settings on both ends and ensuring a reliable connection is established.
- Sending Commands: Once the serial connection is established, you can send commands from Blender to Arduino. These commands can be as simple as turning an LED on or off, or they can involve more complex operations such as controlling servo motors or reading sensor data.
- Mapping Inputs to Actions: To make the control process more intuitive, you can map inputs in Blender to specific actions on the Arduino board. For example, you can assign keyboard shortcuts or mouse movements to trigger specific commands on the Arduino.
- Real-Time Feedback: One of the advantages of using Blender for Arduino control is the ability to receive real-time feedback. By integrating sensor data from Arduino into Blender, you can create visual representations or animations that respond to the physical world. This feedback loop between Blender and Arduino allows for interactive and dynamic projects.
Visualizing Sensor Data in Blender
In addition to controlling Arduino with Blender, you can also visualize sensor data in Blender. This is particularly useful when working with sensors such as temperature, humidity, or motion sensors. By visualizing the data in Blender, you can create stunning visualizations or animations that provide insights into the sensor readings.
To visualize sensor data in Blender, consider the following steps:
- Reading Sensor Data in Arduino: First, you need to configure Arduino to read data from the sensors connected to it. Depending on the type of sensor, you may need to install additional libraries or write custom code to interface with the sensor.
- Sending Sensor Data to Blender: Once Arduino is reading the sensor data, you can send this data to Blender through the established serial communication. By encoding the sensor readings in a specific format (e.g., CSV or JSON), you can easily parse and process the data in Blender.
- Creating Visualizations: With the sensor data available in Blender, you can create visualizations that represent the data in a meaningful way. This can involve creating graphs, charts, or even 3D animations that change dynamically based on the sensor readings.
- Animating Objects: Another way to visualize sensor data is by animating objects in Blender. For example, you can create an animation where the size or color of an object changes based on the sensor readings. This adds an extra dimension of interactivity and engagement to your projects.
By combining the control capabilities of Blender with the visualization power of sensor data, you can create projects that are not only functional but also visually stunning. Whether you’re building a home automation system, a weather monitoring station, or an interactive art installation, the integration of Blender and Arduino offers endless possibilities for creative expression.
Best Practices for Optimizing Serial Communication Performance
Serial communication between Blender and Arduino can be optimized for better performance by following certain . In this section, we will discuss two key aspects: choosing the right baud rate and minimizing data overhead and latency.
Choosing the Right Baud Rate
The baud rate refers to the speed at which data is transmitted between Blender and Arduino. Selecting the appropriate baud rate is crucial for efficient serial communication. Here are some factors to consider when choosing the baud rate:
- Data Transfer Speed: The baud rate determines how quickly data can be sent and received. Higher baud rates allow for faster communication but may also increase the risk of data loss or errors. Consider the complexity and volume of data being transmitted to determine the optimal baud rate.
- Hardware Limitations: Arduino and the serial interface in Blender have their own limitations when it comes to baud rates. Consult the documentation of your specific Arduino board and Blender version to ensure compatibility and identify the supported baud rates.
- Noise and Interference: Higher baud rates are more susceptible to noise and interference, which can lead to corrupted data. If you are experiencing frequent errors or data loss, consider lowering the baud rate to improve the reliability of the communication.
- Compatibility with Sensors and Actuators: Some sensors or actuators may have limitations in terms of the baud rate they can handle. Ensure that the selected baud rate is compatible with all the devices involved in the communication to avoid compatibility issues.
Minimizing Data Overhead and Latency
To optimize serial communication performance, it is essential to minimize data overhead and latency. Here are some tips to achieve this:
- Data Compression: If the transmitted data contains redundant or repetitive information, consider implementing data compression techniques to reduce the amount of data being sent. This can significantly reduce data overhead and improve overall performance.
- Data Packaging: Instead of sending individual values one by one, package related data together to reduce the number of separate transmissions. This can be achieved by grouping data into arrays or structs before sending them over the serial connection.
- Efficient Parsing: On the receiving end, optimize the parsing and processing of received data to minimize latency. Use efficient algorithms and data structures to extract the required information from the received data quickly.
- Buffer Management: Properly manage the data buffers in both Blender and Arduino to avoid buffer overflows or underflows. Make sure that the buffer sizes are appropriate for the amount of data being transmitted and received.
- Error Handling: Implement error detection and correction mechanisms, such as checksums or parity bits, to ensure the integrity of the transmitted data. This can help reduce the need for retransmissions and improve overall performance.
By considering these , you can optimize the performance of serial communication between Blender and Arduino. Choosing the right baud rate and minimizing data overhead and latency can greatly enhance the reliability and efficiency of your projects.
Security Considerations for Blender Arduino Serial Communication
Serial communication between Blender and Arduino can be a powerful tool for integrating these two platforms. However, it is important to consider the security aspects when implementing such communication. This section will explore two key security considerations: implementing data encryption and protecting against unauthorized access.
Implementing Data Encryption
Data encryption plays a crucial role in ensuring the confidentiality and integrity of the information transmitted between Blender and Arduino. By encrypting the data, we can prevent unauthorized individuals from intercepting and deciphering the messages.
There are various encryption algorithms available that can be implemented in both Blender and Arduino. One commonly used encryption technique is the Advanced Encryption Standard (AES). AES provides a high level of security and is widely supported by many programming languages and microcontrollers.
To implement data encryption, both the Blender and Arduino applications need to use the same encryption algorithm and key. The data can be encrypted in Blender before sending it to Arduino, and Arduino can decrypt the received data using the same key. This ensures that even if someone intercepts the data, they will not be able to understand its contents without the proper decryption key.
Protecting Against Unauthorized Access
In addition to data encryption, it is important to protect the serial communication between Blender and Arduino from unauthorized access. Unauthorized access can lead to malicious actions, such as unauthorized control of the Arduino device or manipulation of the data being transferred.
One way to protect against unauthorized access is by implementing authentication mechanisms. This involves verifying the identity of the sender and receiver before allowing the communication to take place. Authentication can be achieved through the use of secure protocols, such as Transport Layer Security (TLS) or Secure Sockets Layer (SSL). These protocols ensure that the communication is encrypted and that the parties involved are who they claim to be.
Another important aspect of protecting against unauthorized access is ensuring the physical security of the Arduino device. This can be achieved by placing the Arduino in a secure location or using tamper-proof enclosures. Additionally, restricting physical access to the device and regularly updating passwords can further enhance its security.
By implementing data encryption and protecting against unauthorized access, the security of the serial communication between Blender and Arduino can be greatly enhanced. These measures ensure the confidentiality, integrity, and authenticity of the data being transmitted, making the integration between the two platforms more secure.